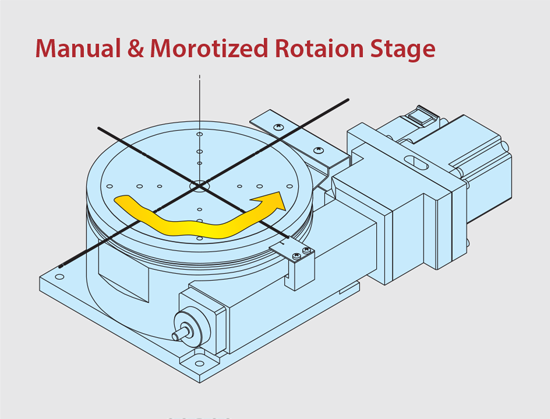
- 1. Accumulated Lead Error(Positioning Accuracy)
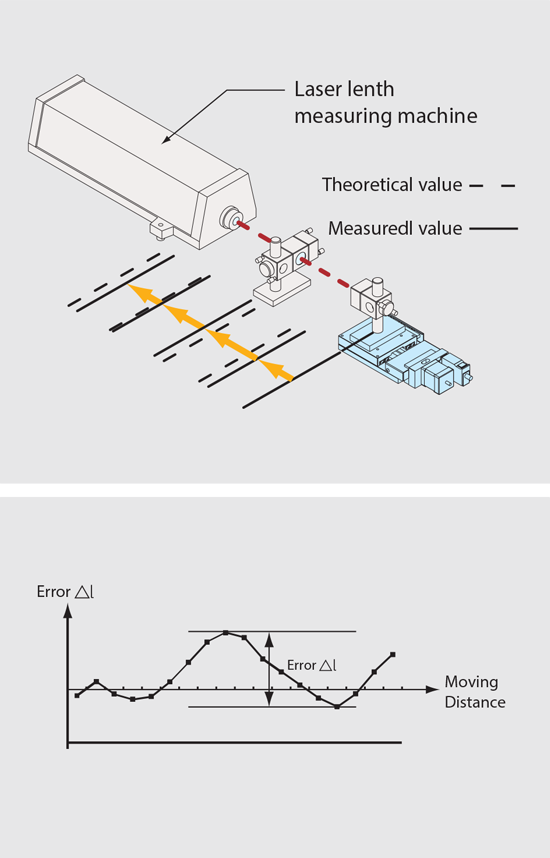
- The positioning accuracy depends on errors in six degree of freedom. In a case of a linear positioning stage, the positioning accuracy is influenced by angular error (pitch,yaw, and roll), straightness (vertical and horizontal), and the lead error. Here is defined the positioning error is came from the lead error of screw as one of main reason and it is accumulated when the linear stage moves unidirectional within the full stroke. That’s why it is called as “Accumulated Lead Error.” It is difference between a real output and ideal / calculated input. When the linear stage makes positioning in each position by each commanded values, there is an error between them. It is measured and calculated like following; (Actual displacement) – (Commanded displacement value). The maximum deviation within the full stroke is defined as the Accumilated Lead Error.
- 2. Repeatability
- Positioning is repeated 7 times at an arbitrary point from the same direction, the stop position is measured. Perform this operation on three (3) points: at the center and at both ends. Then multiply the maximum deviation by 1/2. Repeatability is indicated by adding ± to one half of the maximum deviation. The load is only a corner cube placed on the center of the table.
- 3. Lost Motion
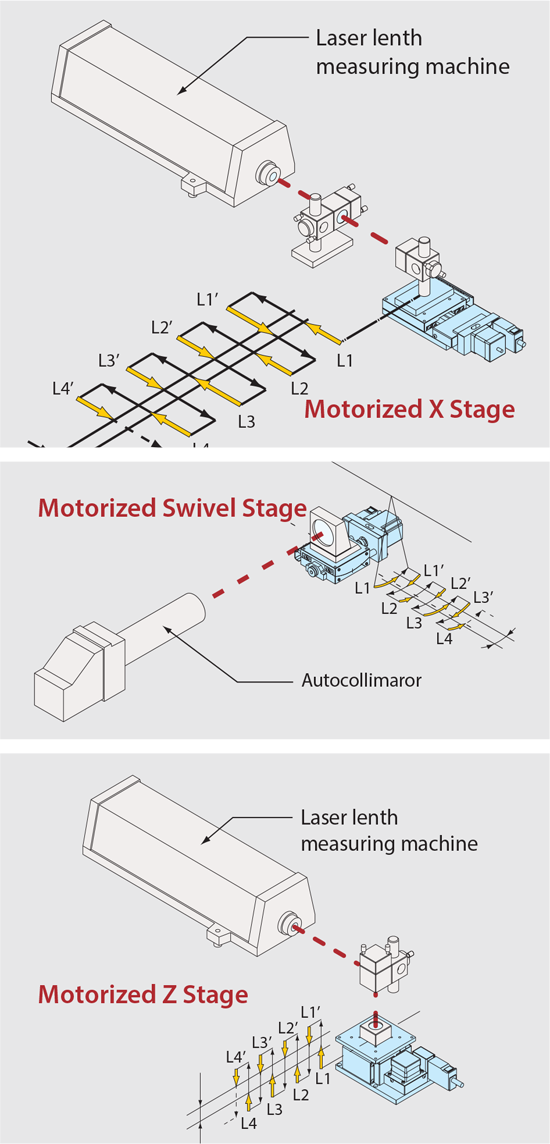
- Positioning from a specified position (measurement position as a reference) from the positive direction and measuring its position. (L1) After moving in the forward direction, the same amount of command is given in the negative direction (motor rotation CCW direction) and Measuring this position. (L1 ') After moving in the negative direction, The same amount of command is given in the forward direction to move and determine the position. and Measuring that position. (L2) This positioning measurement is performed seven times in the forward and the negative directions, The maximum value within a given position obtained by calculating each difference and averaging the values is called a lost motion. However, the predetermined position means that the X stage has three points at the center and both ends, The swivel and Z stage are centered at one point.
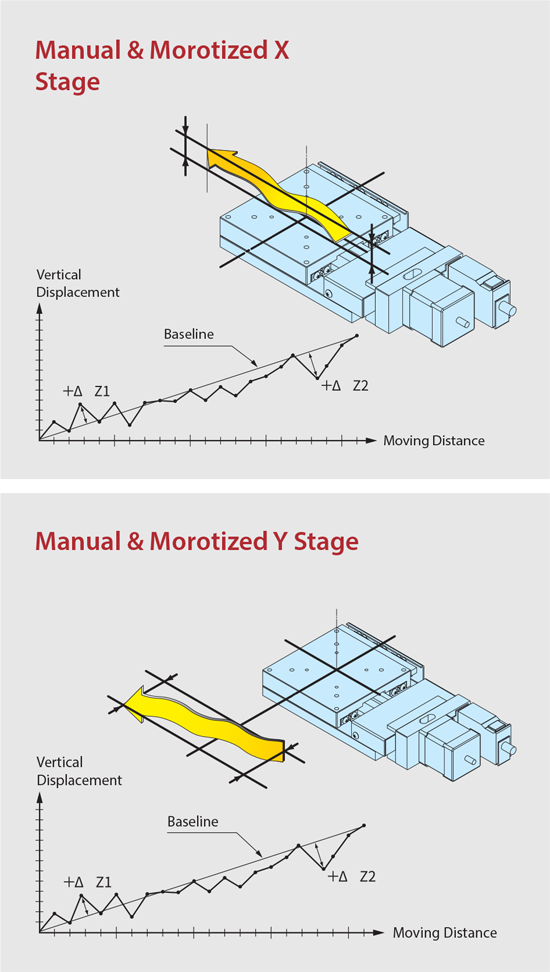
- 4. Straightness (Within the vertical plane)
/ Straightness (Within the horizontal plane) - Place a reference plane (such as a straight edge) on the table top face, trace a displacement gauge in the table moving range, and obtain the maximum value of displacement from the straight line that connects the start point and the end point. This value is defined as straightness. The straightness has a vertical component and a horizontal component. The maximum value of each component is defined as the stage straightness.

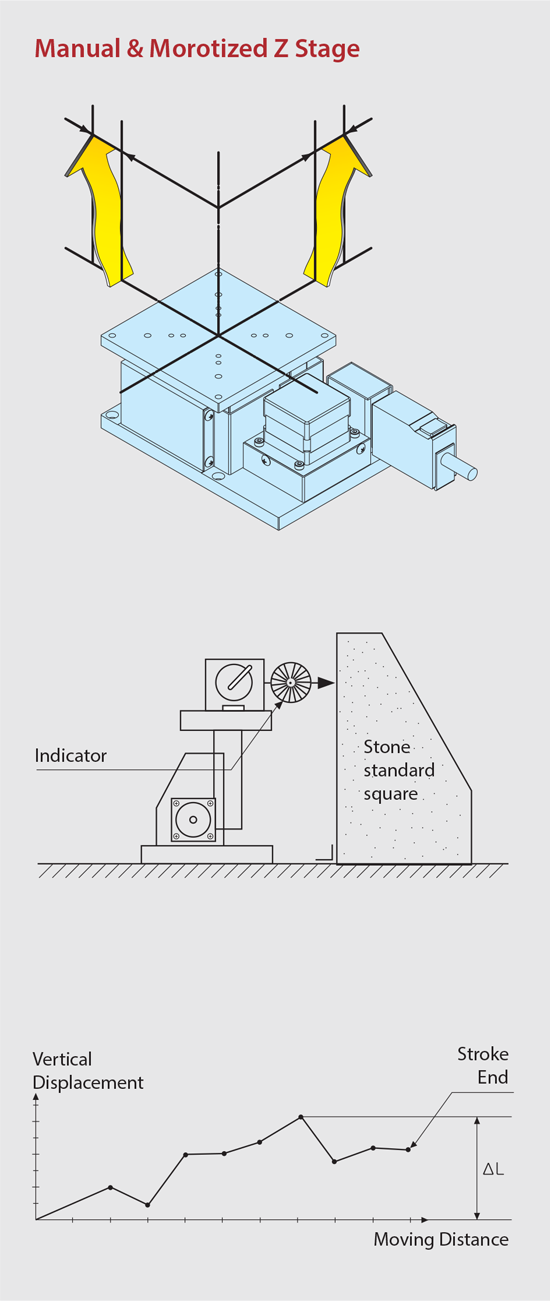
- 5. Verticality(Two directions)
- An indicator is set up at the table so that it touches the perpendicular surface of the standard square, and then it is raised while measuring the displacement. Displacement when moving from the starting point of one stroke end(displacement 0) to the opposite stroke end is defined as verticality.
- 6. Backlash
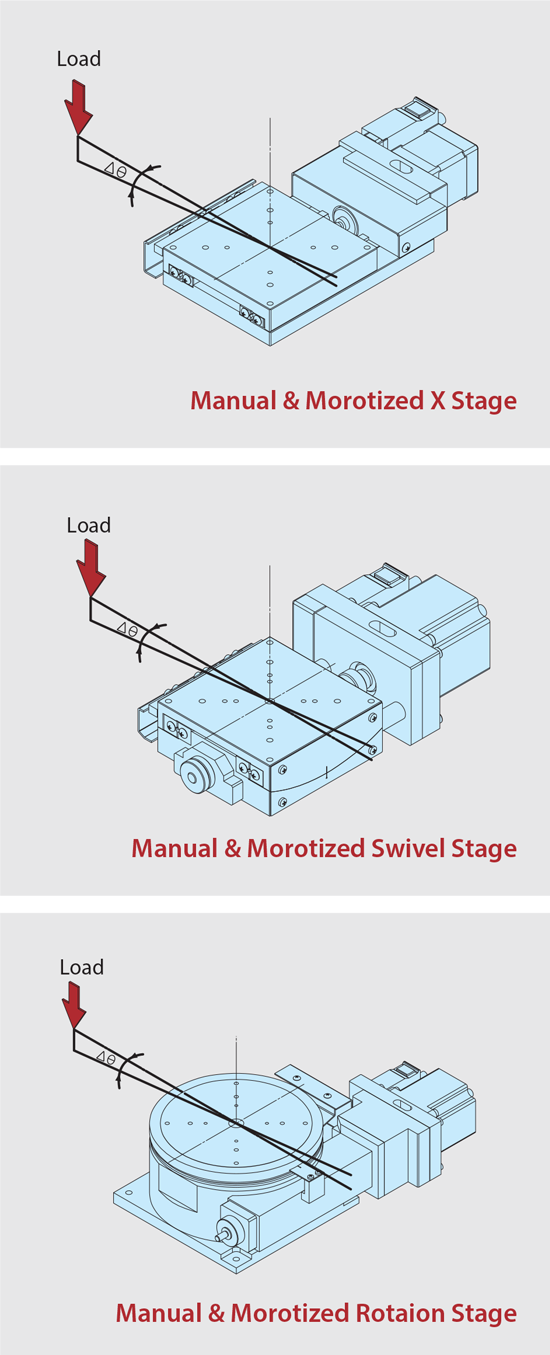
- Let the table be the ORG position or the center of the movement range as the reference position, Loads the specified load in the same direction as the direction of travel when moving to the reference position, then releases the load. The difference between the reference position and the position after releasing the load is called backlash.
- 7. Moment Load Stiffness(Roll Direction)
- When an force in the roll direction is applied, the table tilts. Momentum Load is defined as the tilt angle of the table per momentum unit. Units are(arcsec / N·cm)
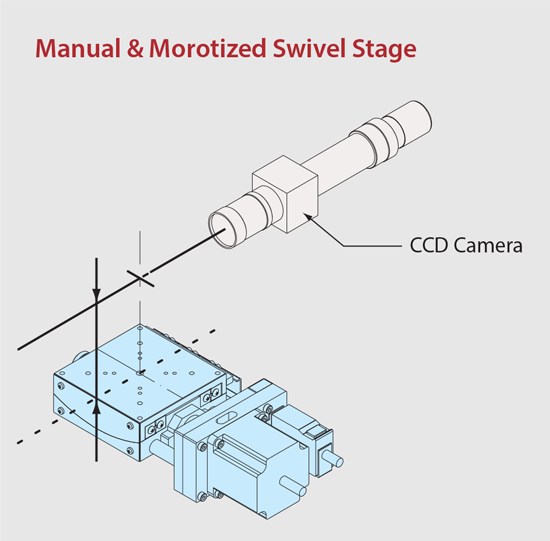
- 8. Rotational center displacement
- When the reference point is installed on the actual rotation axis of the table, and the table is moved within the entire movement range, the shaking of the reference point is measured by the CCD camera, and the amount of shaking is called the rotation center displacement amount.
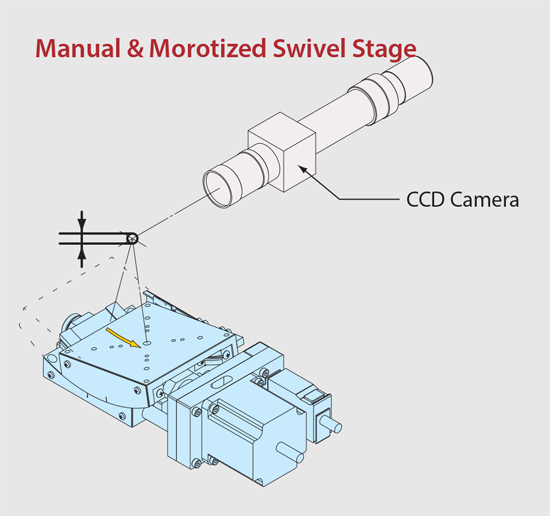
- 9. Work Distance
- The distance from the reference point set for measuring the rotating center displacement to the table top face is defined as the working distance.
- 10. Horizontal withstand load
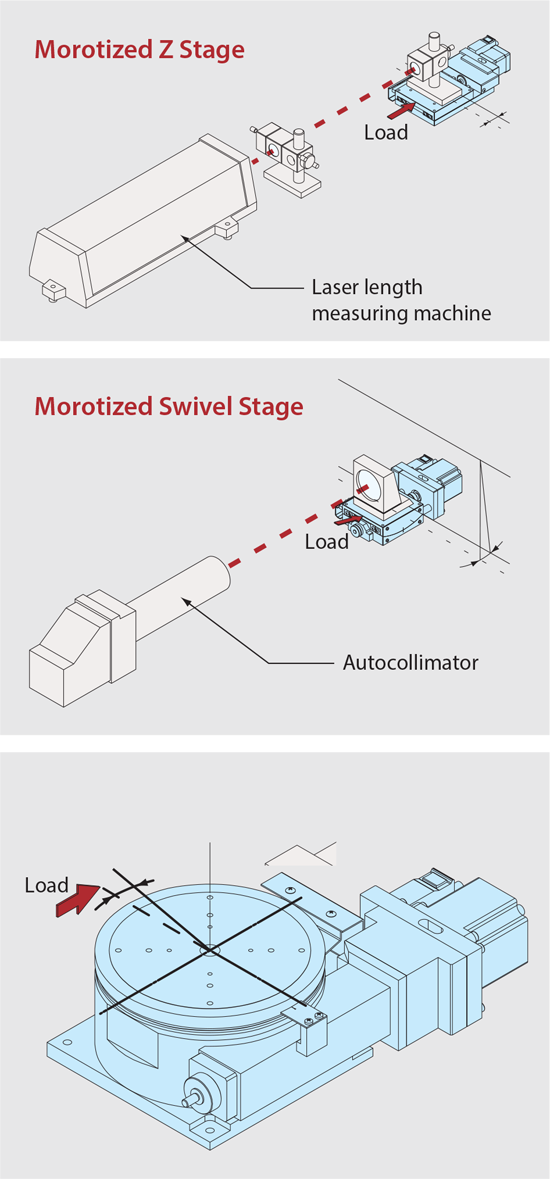
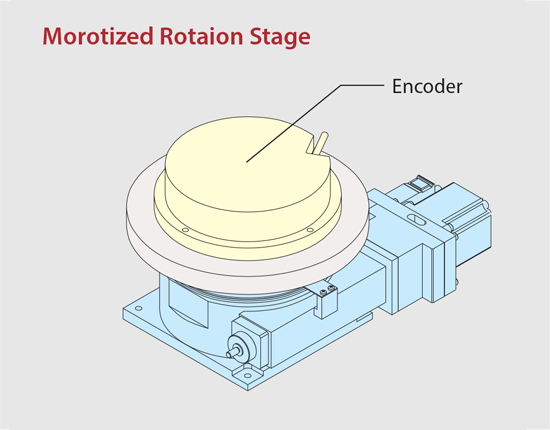
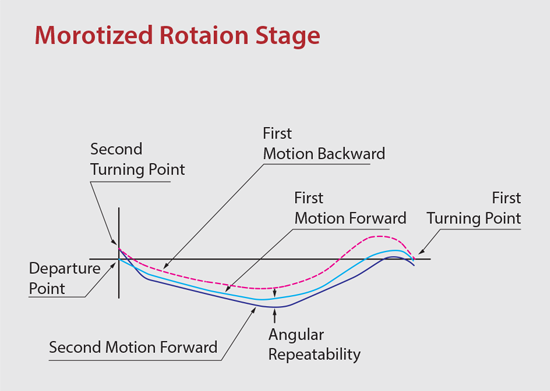
- This is the limit load that can be applied to the table center when the stage is installed horizontally. (It is a limit load that can be guaranteed.) An encoder (shown in the below figure) is used for precision inspections of the accumulated lead error, lost motion, angle repeatability, and pitch error of motorized rotary stage (θstage).
- 11. Accumulated Lead Error
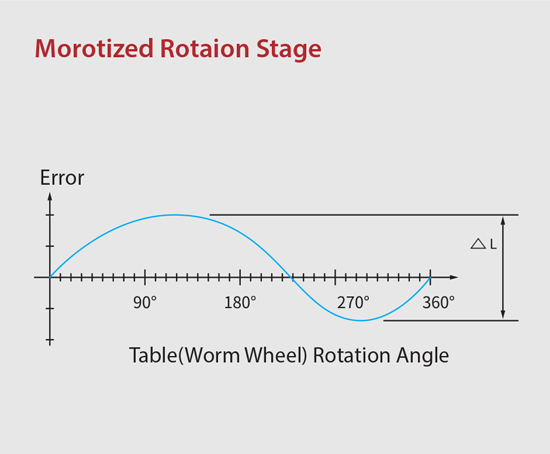
- A predetermined position is set as a reference point, Positioning is sequentially performed at regular intervals in one direction at a reference point, and then the difference between the measured value at each positioning point (the position actually moved from the reference point) and the command value (the position at which the command should actually be moved) is measured at 360 ° and the maximum difference is called the cumulative error. (ΔL in the left figure)
- 12. Lost Motion
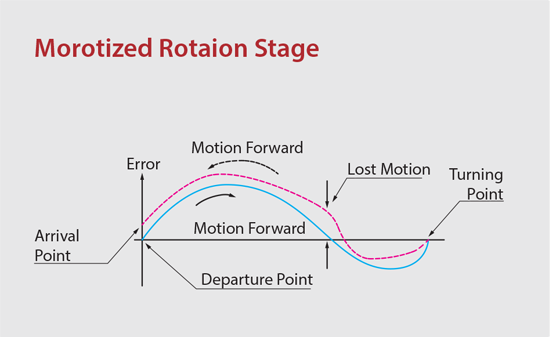
- It is determined at a certain position as a reference point, and is sequentially measured at a certain interval in one direction at a reference point. After one rotation measurement, the measurement is performed in the opposite direction equally to the reference point. The maximum difference between the position of each locating point and the position of each locating point is called the lost motion.
- ※ Lost motion and definition of X stage are different.
- ※ The definition of the lost motion of the tangent bar type rotation stage is the same as that of the automatic swivel stage.
- 13. Angular Repeatability
- It is determined at a certain position as a reference point, and is sequentially measured at a certain interval in one direction at a reference point. After one rotation measurement, the measurement is performed in the opposite direction equally to the reference point. The maximum difference between the position of each locating point and the position of each locating point is called the lost motion.
- ※ The definition of angular repeatability of tangent-bar lead mechanism motorized rotation stage is same as motorized swivel stage.
- 14. Pitch Error
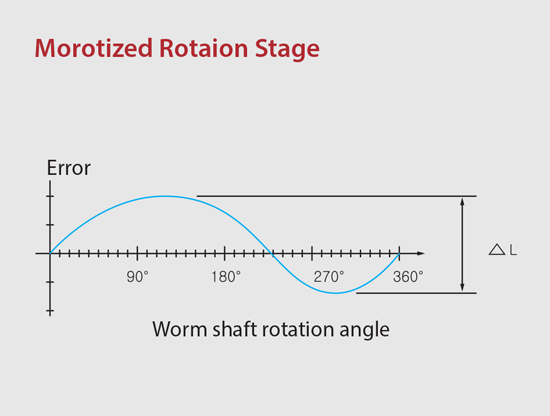
- A predetermined position is set as a reference point, the difference between the measured value (the position actually moved from the reference point) and the command value (the position at which the commanded actual movement is made) at each of the positioning points is set as a difference Measured in the range of 1 value (1 revolution of worm shaft), and the maximum difference (ΔL in the right figure) is called pitch error.
- 15. Surface Runout
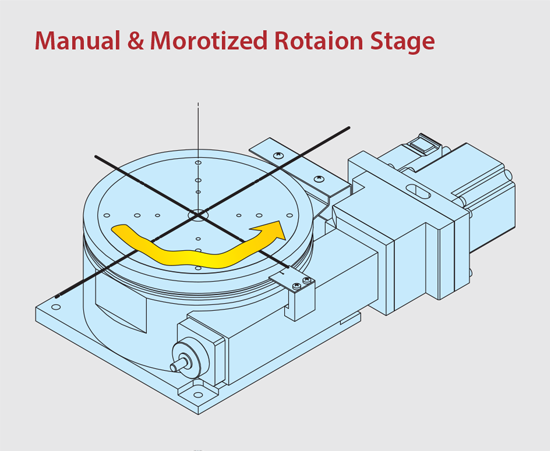
- An indicator is placed into contact in the vicinity of external periphery of the table, and a measurement is made at 36 points for every 10°. Maximum error (peak to peak) is obtained. This value is the sum of deviations resulting from surface runout errors and that derive from finished table surface irregularities.
- ※ The surface runout of tangent-bar lead mechanism rotation stage is measured in full stroke angular range.
- 16. Eccentricity
- The inner diameter as a reference is provided in the main shaft. During final assembly, displacement of this inner diameter is measured with an indicator. This value is the sum of roundness deviations of the inner diameter and eccentricity, and we define this value as eccentricity.(only for Mont-Blanc series)
- ※ The eccentricity of tangent-bar lead mechanism rotation stage is measured in full stroke angular range.
